A description of what I do as a bending engineer
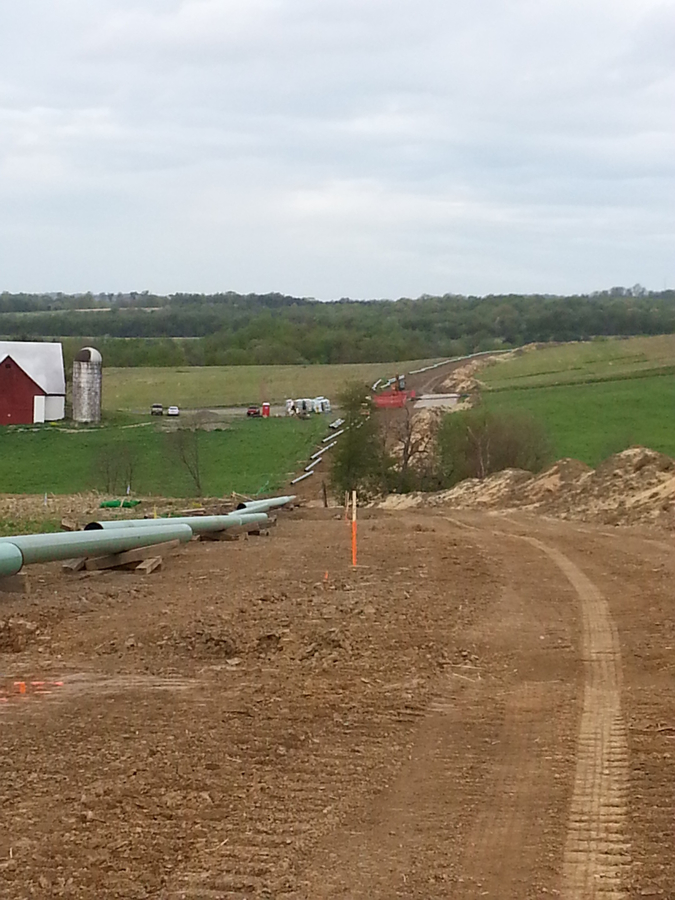
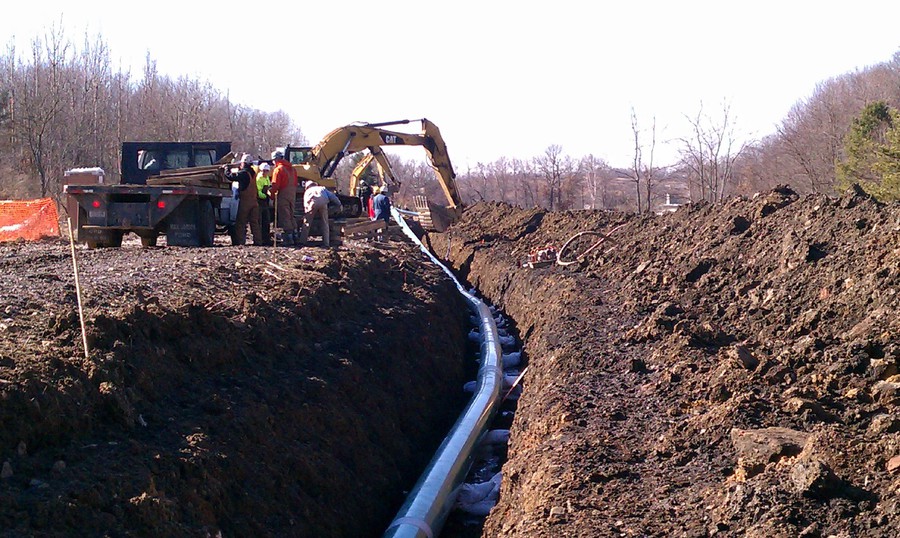
Once the right of way (ROW) is built, they will either dig the ditch, or let me "string" the straight pipe ahead of the ditch. Either way, I'm going to be measuring the contour of the ditch to see where I need to put the bends in the pipe to allow it to sit flush on the bottom.
I first measure each joint of pipe, to the hundredths of a foot, and write them in my field book. Numbering each joint as I go. I then get into the ditch and start measuring the joints in, leaving slack for any bends. I also pay attention to any possible bents that may fall in the joint to ensure they won't be too close to the end where I can't bend. If they might, I swap different length joints around to allow the bends to fall in an area where I can bend. If the ditch isn't excavated yet, I just measure it out on top of the ground. At the end of each joint, I place a paint stick with the joint numbers allowing me to know which joints get bends.
I then walk through the ditch with an Abney hand level which allows me to shoot my sags and overbends. I place a paint stick at each, paying attention to make sure that they don't fall too close to the end of a joint. I shoot my “eye height” on a grade rod that my laborer carries out ahead. I tell him where to stop when I think that there is a change in the contour of the bottom of the ditch. I then walk to that spot and take the next reading.
As I’m shooting my sags and overbends, I drive stakes in the centers of any P.I.s (Points of intersection) so I can come back and turn them with a transit. As I’m measuring the bends, I write the information in my field book alongside each corresponding joint.
Once I gather all the bend information, I go to each joint and write the bends up. The end that the weldors approach first will get all the information about the bend/s on that joint and then I’ll write it on the inside of larger pipe.
I then measure out where the bends are supposed to be on the joint and write the information at that spot beside the bend mark. If it is a combination bend, sidebend with either a sag or overbend, I’ll write all the information as well as the amount the joint will have to roll once bent to make the seam roll into the correct orientation.
I repeat the process for each section, with the bending crew following behind.
Once the joints are bent, they will place then ahead of my joint stakes, in order. The pipe gang will come through welding the joints up into sections, using information provided on the pipe to properly align them so when the section is built, it will follow the contour of the ditch.
Once the welds are compete, the will be x-rayed, coated and the ditch excavated/prepared.
A crew then comes behind lowering in the pipe. Using my sticks in the ditch and other stakes marking the start of the section, they place the bends as close as possible to where they are supposed to go.
More detailed information
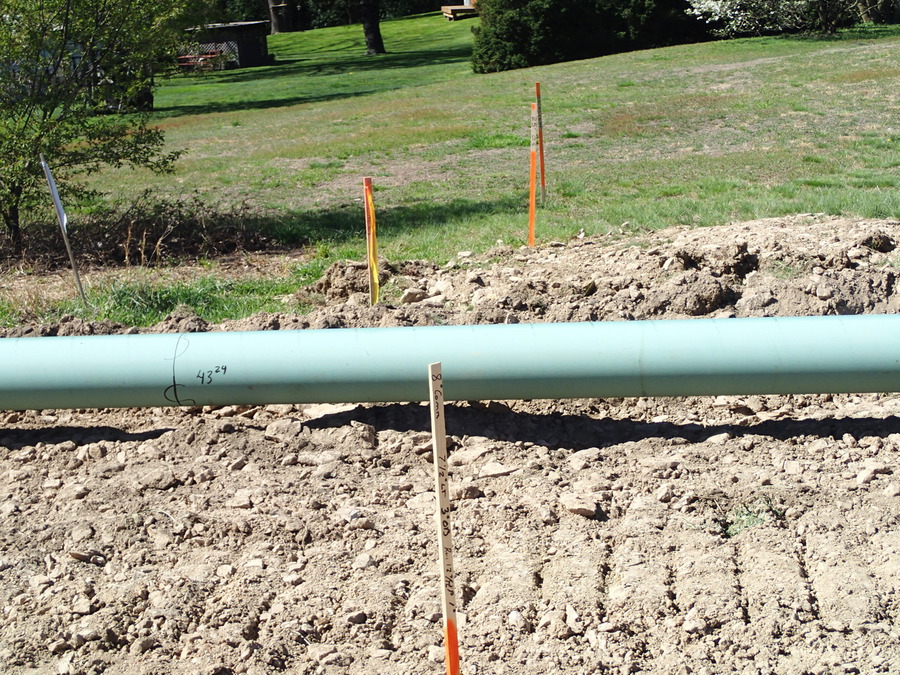
8° Combination, [7-1/2° LT 3° OB] PI ditch stake in foreground with offset stakes in the grass. They allow the ditch crew to reset the PI stake it it gets knocked over during construction. Total station now eliminates the need for offset stakes.
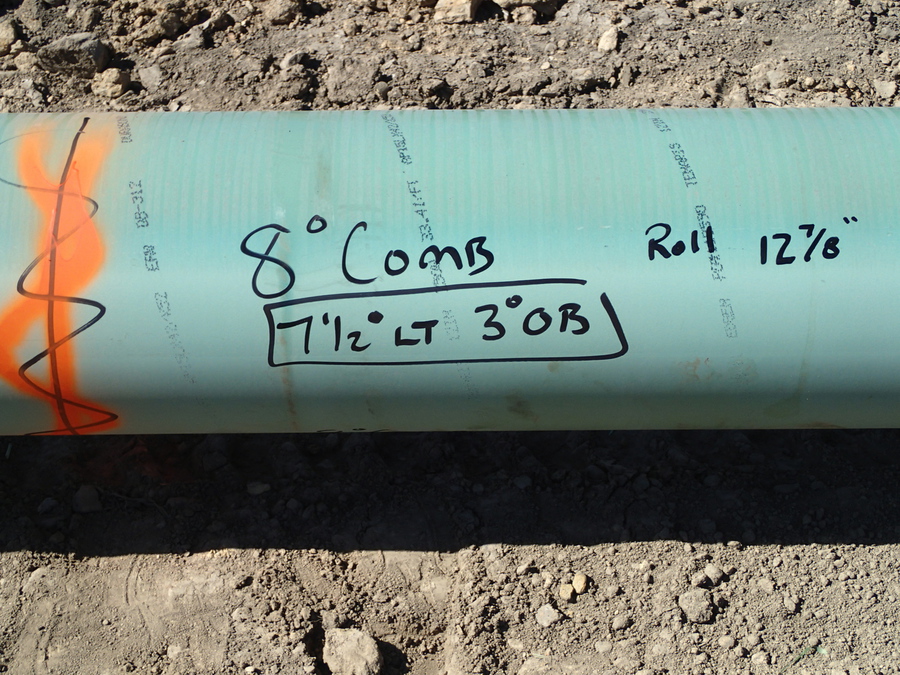
8° Combination wrote up on the joint with the bend mark painted orange to make it easier for the bending crew to see. The roll is calculated using my formula and written by the bend.
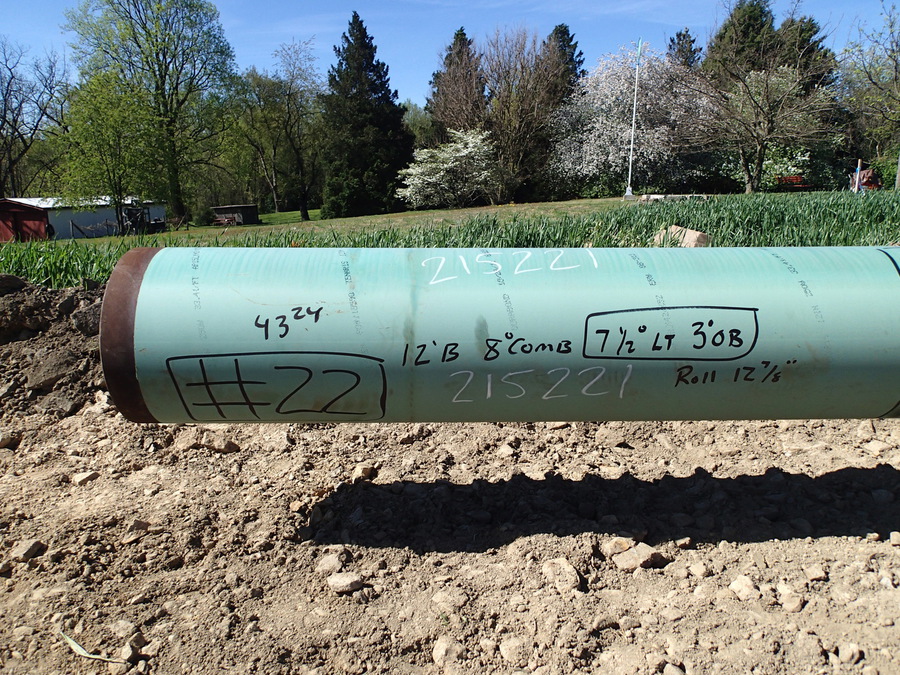
The same information at the back of the joint where the journeyman won't have to go to the bend to determine what it is.
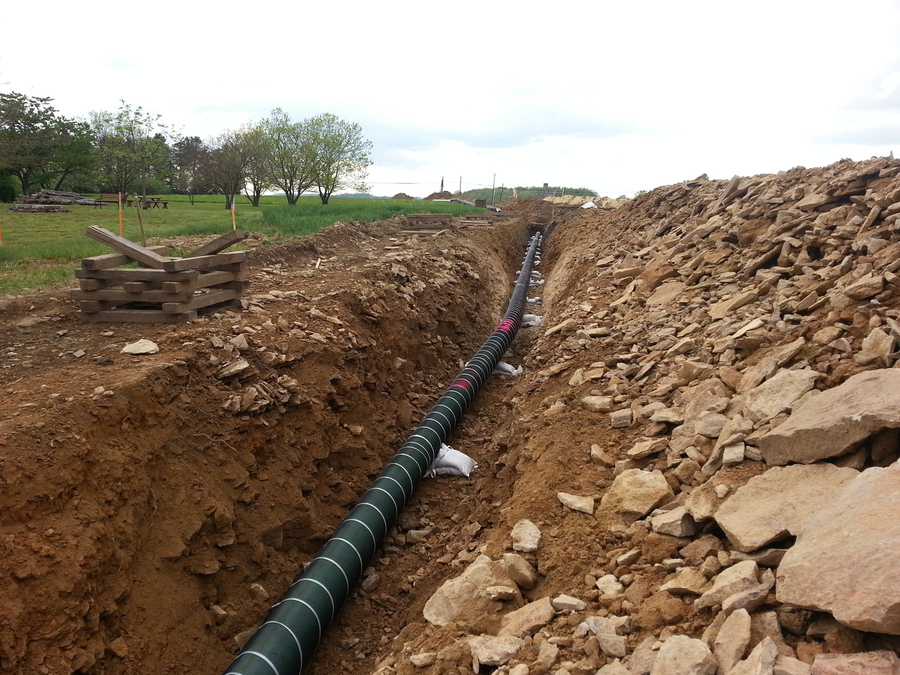
8° Combination welded into section, coated, rockshiled applied and in trench awaiting backfill.
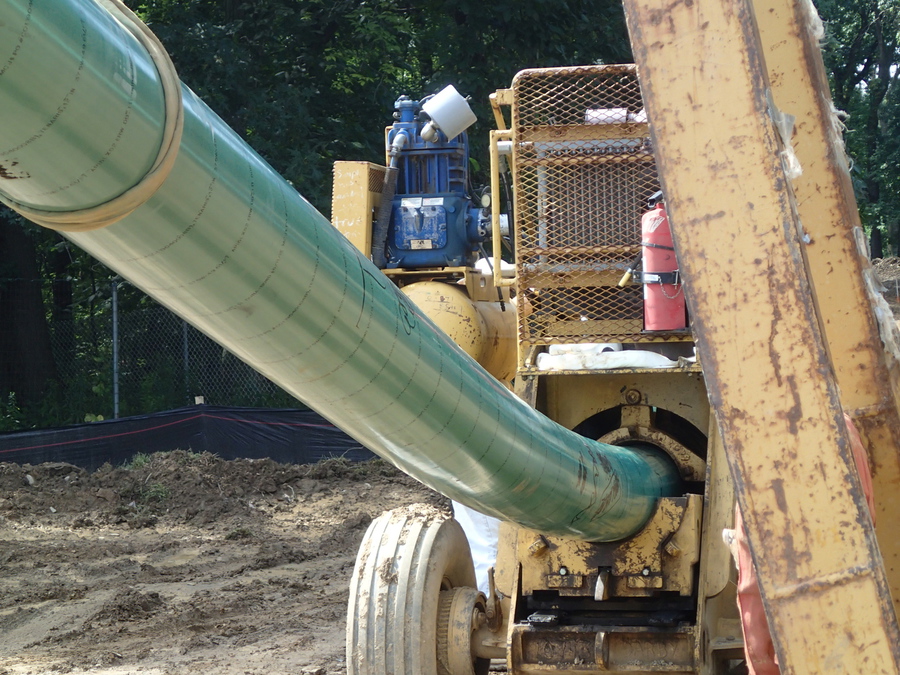
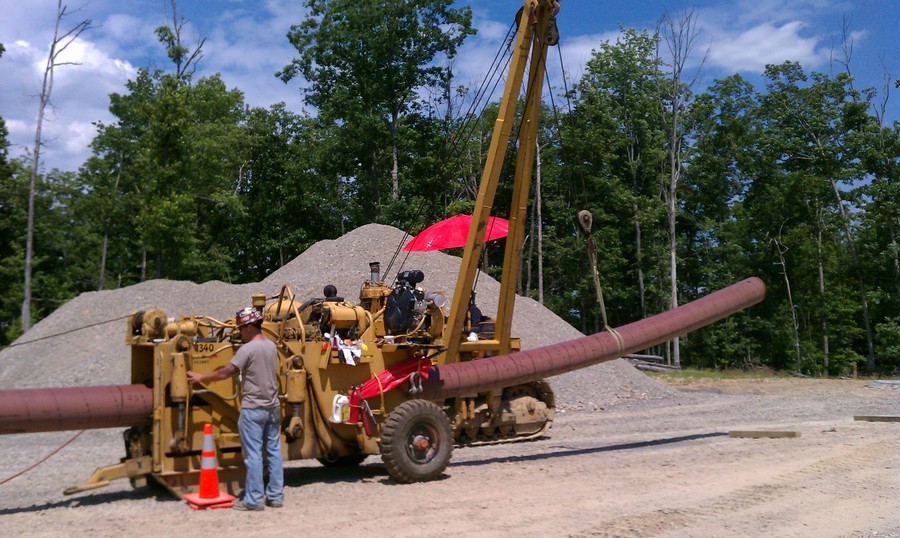
Joint being bent. A 12" joint can have one degree of bend per foot of pipe. 24" pipe can have 1/2° of bend per foot. Since half of the bend will fall to either side of the mark, I place marks on the pipe to let the crew know where to start bending so when finished, the bend is centered on the bend mark.
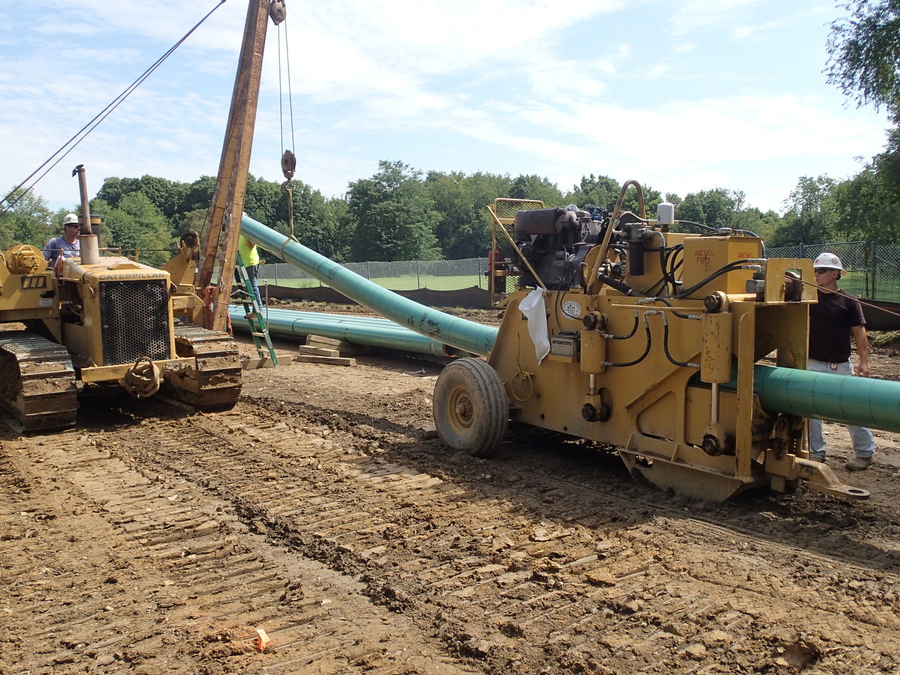
The sideboom picks up on the back of the joint as it is being bent. Primary reason is to pull it up tight into the upper bending die. Secondary, but just as important reason, is to help keep the joint from rolling. To make an accurate bend, it needs to be held as a straight sag through the entire process.
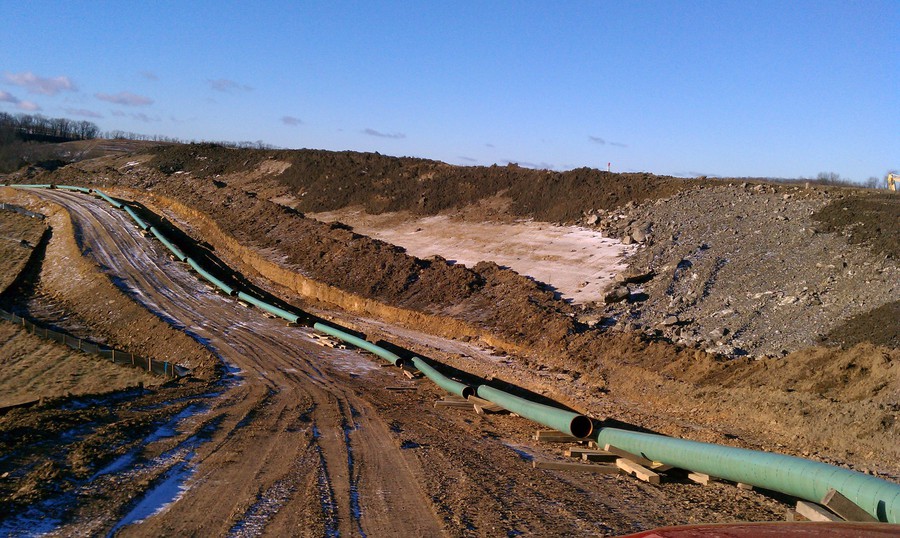
Sections welded together, coated and rockshield applied. Waiting for ditch to be excavated. Because of tight right of way conditions, with live line to the right, the pipe was laid up on a bench, out of the way. The break in the sections is a foreign line crossing. A two joint section is built and laid on it's side with bends to go deeper under the existing line and then come back up to regular depth.
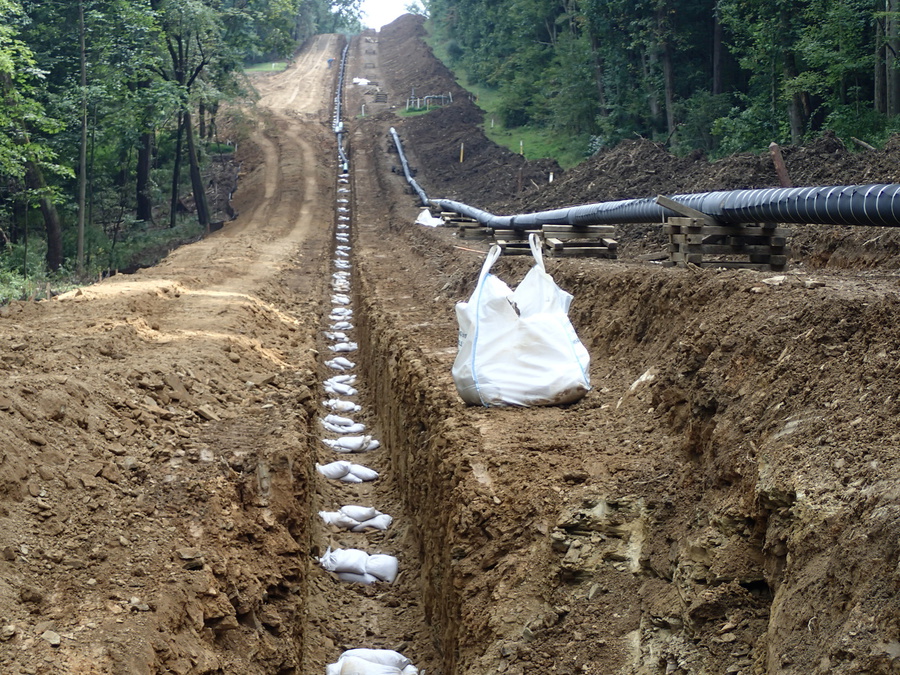
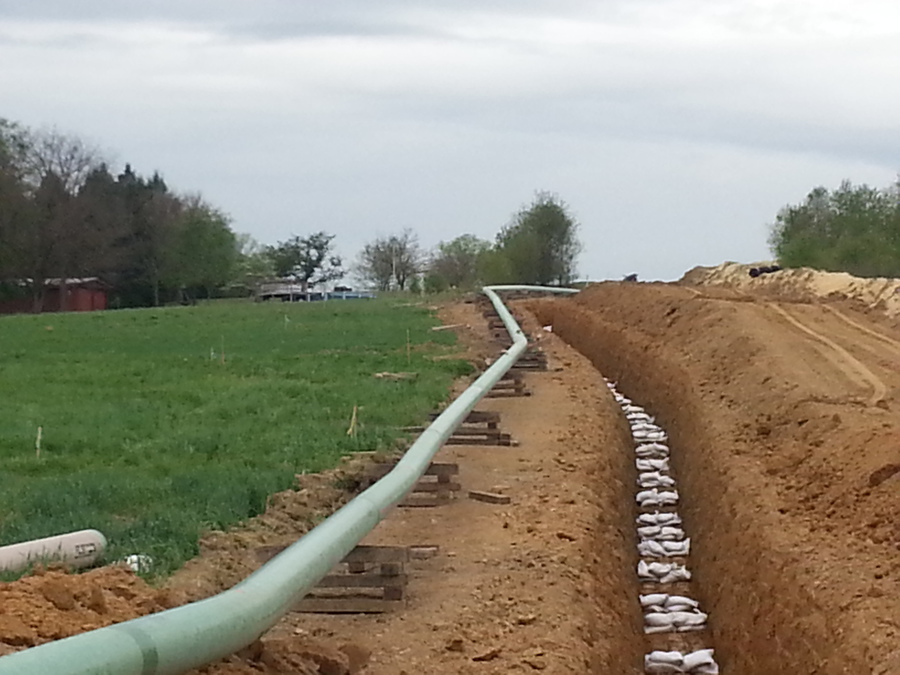
Same sections with ditch trenched, sacks for support in the ditch.Upper section is in the ditch along with the two joint section threaded under existing line awaiting to be welded to sections.

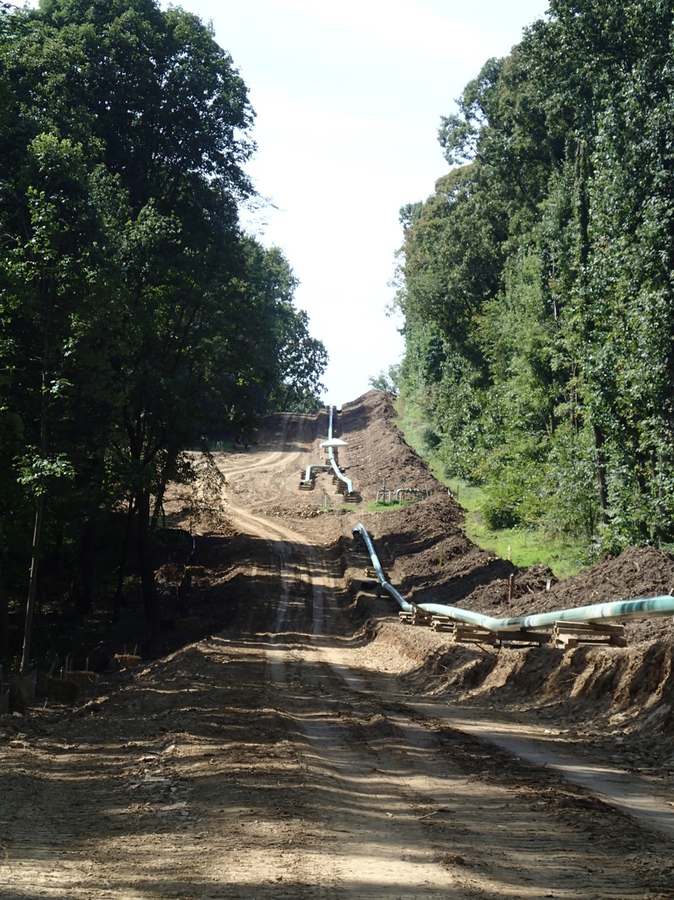
Lower view of hill with pipe strung.
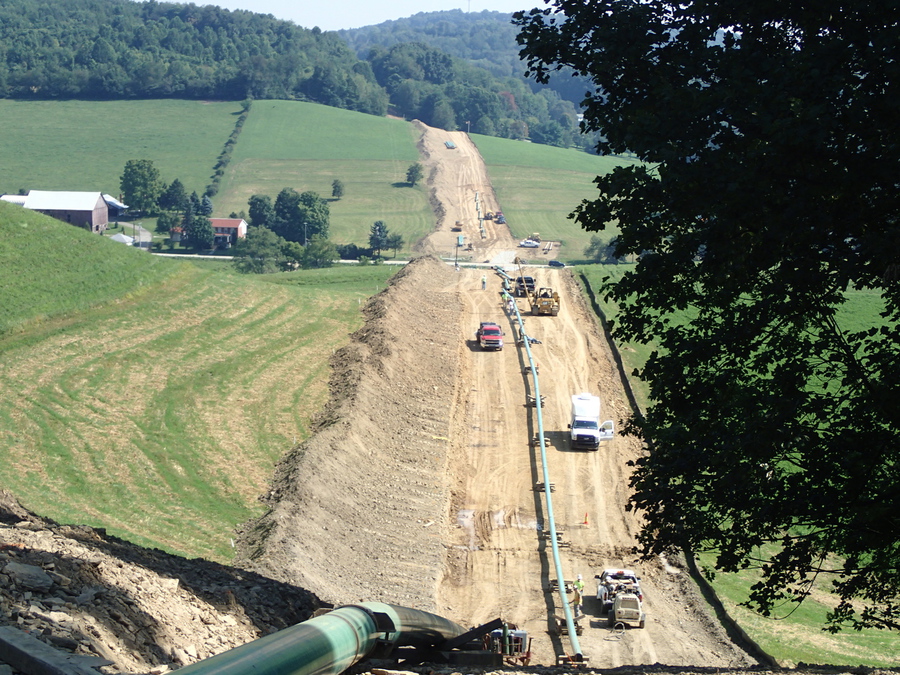
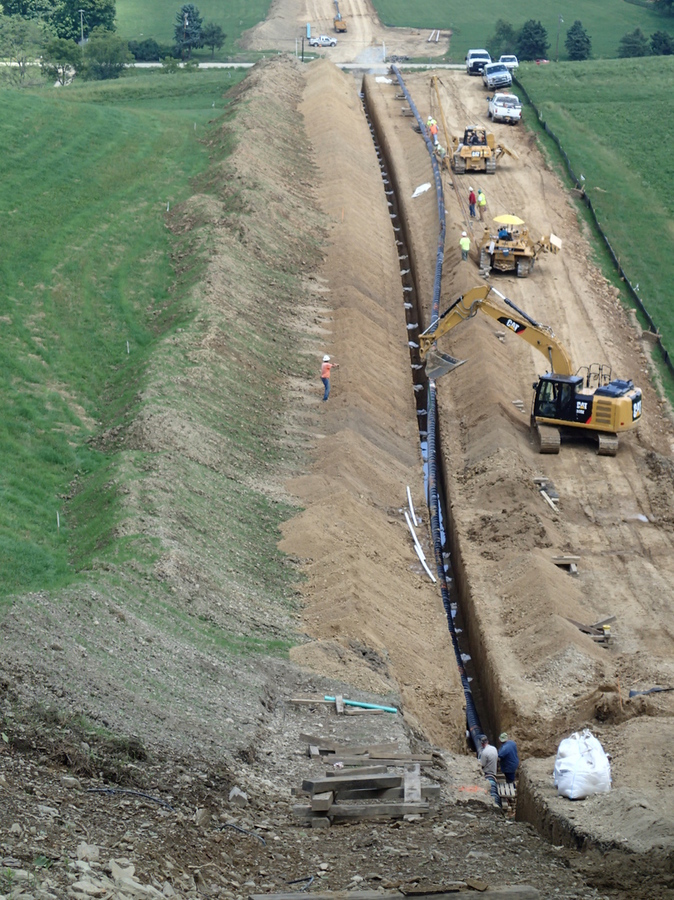
View from top of the same hill with mini pipe gang welding. Coating crew at the bottom of the picture.
Same section being lowered in. Weldor in the bellhole waiting for section to be completely lowered in and equipment to make a lineup.
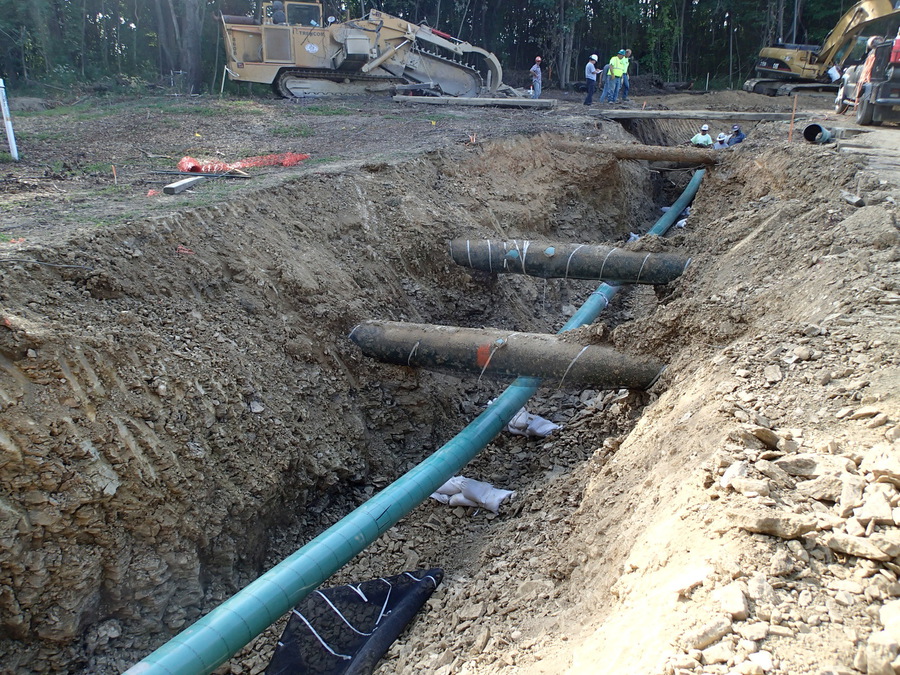
Two 20" lines, with ~750psi of naturl gas running through them, and an abandonded 12" line being crossed. 2' of separation must be maintained from bottom of foreign line and top of new line. Ditch was over dug and sacks will be placed under pipe to support once everything is tied it. Bend under closest line is a sag to start coming back up in elevation at tie in hole where weldor is.